Maple Braised Pear and Almond Cake


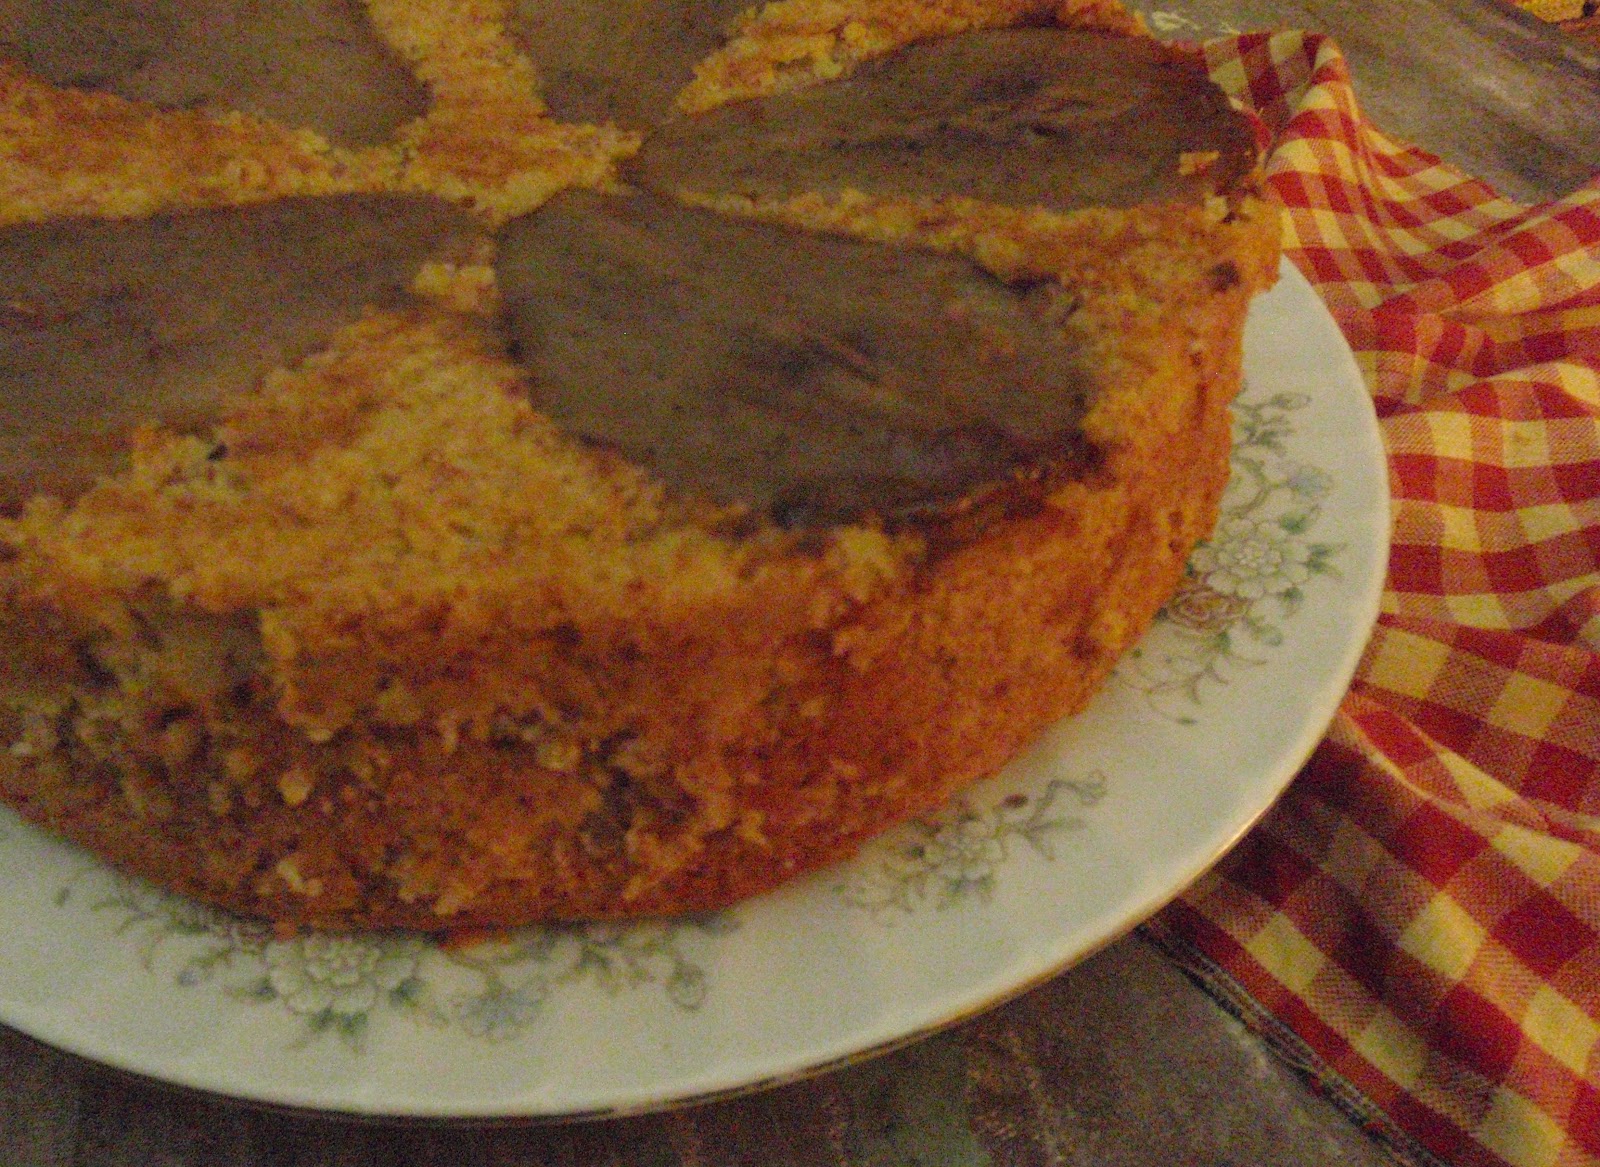
This is by far my new favorite cake, and it is perfect for this time of year – we are still in the dregs of winter but all we can think about is springtime. What we need is something to brighten the dull prospect of 6 more weeks of winter (thanks a lot Punxsutawney Phil). This rustic cake is light and sweet with a delicious earthiness brought out by the clove. It is best served warm and with dreams of spring flowers.

What You’ll Need:

2 large bosc pears
1 cup unsalted butter, plus 3 tablespoons
½ cup maple syrup
½ cup dry white wine
½ teaspoon ground clove
1 cup almonds
1 ½ flour
1 tablespoon baking powder
½ teaspoon salt
4 eggs
¾ cup sugar
2 teaspoons almond extract

  1. First things first, let’s prepare the baking pan. Butter and flour a 9” spring-form pan and set aside. This will be sufficient to prevent sticking, but you can also cut a round of parchment paper, coat with butter and flour and place the round in the bottom of the pan.
  2. Next, peal your pears and remove the stems. Cut the pears in half lengthwise. Next, slice the pear, lengthwise so you get essentially something that looks like the silhouette of a pear when held upright. Using a sharp paring knife, remove the seeds being sure to preserve the shape of the pear as best you can (this cake is as much about presentation as it is about flavor). After you are done slicing your pears, choose the 5 best, prettiest slices. These will be the top of your cake. Set those 5 slices aside and chop the rest of your pair into small cubes.  Set the cubes aside in a small bowl.
  3. In a large skillet, melt the 3 tablespoons of butter over medium heat.  Once the butter is melted, add the 5 pear slices. Cook the pears until they are tender and start to brown on either side, about 5 minutes. Be sure to flip them occasionally so they cook evenly, and don’t overcook them or they’ll be too mushy in the cake.
  4. When the pears show little speckles of tasty brown goodness, add the white wine then the maple syrup and clove. Using tongs, push the pears around in the sauce and cook for about another 5 minutes and remove from the heat.
  5. Using your tongs, arrange the pears in the bottom of your spring-form pan, the tops of the pears facing in toward the cake and the bottoms facing out, like a flower. Reserve the delicious sauce we cooked the pears in for serving (you’ll be glad you did).
  6. On to the cake! Preheat the oven to 325. Melt the remaining butter and allow to cool slightly. Add the almond extract to the butter and stir to combine.
  7. Using a food processor or blender, grind the nuts until they are a powder, almost like almond meal but not as fine. Add the almonds to a large bowl. Add the flour, powder and salt and whisk to combine.
  8. In a separate bowl, using an electric or stand mixer, beat the eggs and sugar on high until very light and fluffy and almost tripled in volume.  
  9. Add 1/3 of the flour mixture to the egg and fold gently until just combined. Add half of the butter and do the same. Add another 1/3 of the flour. Continue to alternate between flour and butter until everything is added. Once the flour and butter are fully incorporated, gently fold in the little pear cubes.
  10. Pour the cake batter into the pan over the pears slices. Place the cake in the oven for 55 to 65 minutes (I know it’s a long time, but it’s worth it!) until a knife inserted in the middle comes out clean and edges are golden brown.
  11. Once the cake is out of the oven, use a paring knife to free the edges from the side of the pan. Let cool for 10 minutes. Remove the side of the pan. Next, place a plate on to of the cake. With one hand on the plate and one hand on the bottom of the spring-form pan, flip the cake onto the plate. Carefully run a thin spatula or long knife between the spring-form top and the cake to release the cake. If you used parchment paper, the spring-form should come right off. Remove the spring-form top and there you have it! Serve warm with the reserved sauce drizzled over top. Mm mm!

Persimmon and Ginger Tartlets


Believe it or not, persimmons are actually a winter fruit. They offer a deliciously sweet flavor in the dead of winter. These tartlets are the perfect little bite-sized pick-me-up on a cold, winter day - the spice of the ginger mixed with the sweetness of the persimmon is sure to please! Oh, and not to mention the richness of the cream cheese crust!

What You'll Need:

FOR THE CRUST
3 oz. cream cheese
4 tablespoons butter
2 tablespoons powdered sugar
¼ teaspoon fine sea salt
1 cup flour
24 paper cup cake cups

FOR THE FILLING
6 ripe persimmons
¼ cup dark brown sugar
1 teaspoon freshly grated ginger
2 tablespoons corn starch
¼ cup warm water
½ teaspoon fine sea salt

  1. Let's start with the dough. Using the paddle attachment on a stand mixer, combine the cream cheese and butter. If you do not have a stand mixer, make sure the cream cheese and butter are at room temperature and you can mix them by hand with a wooden spoon.
  2. Combine the flour, sea salt and powdered sugar in a small bowl and slowly add to the cheese mixture. Mix until the dough is nice and thick.
  3. Take the dough out of the bowl and turn out onto a generously floured work surface. Form the dough into a ball and then pat it flat into a disk. Cut the disk in half. Next, cut each half in half (you now should have 4 equal pieces). Next take each ¼ and cut it into thirds (now you have 12 equal pieces). Finally, roll each piece into a ball and cut each one in half. (now you have 24 equal pieces). Phew!
  4. Now comes the time to form each crust. Form each of your 24 pieces into a ball and push each one flat into a disk using your finger tips until they are about 4" in diameter. They don't have to be perfect circles - think rustic. Next, place each disk into a paper cup, gently pushing the dough into the form of the cup. Place each cup into a muffin tray so they hold their shape.
  5. Place the muffin tray in the freezer for 15 minutes. While you're waiting, preheat the oven to 400. When the crusts are done freezing, take them directly from the freezer to the preheated oven and bake for about 6 to 8 minutes until golden brown. Remove from the oven and let cool completely.
  6. Let's prepare the filling while the crusts cool. First things first, peel your persimmons. There are a number of ways to do this but I found the best way is to cut off the top then use my fingers to separate the pulp from the skin. This is a messy job, but someone's gotta do it.
  7. Once you have the pulp separated, "chop" the pulp into small pieces. The reason why I put chop in quotations is because these babies are pretty juicy so its more of a smoosh than a chop. Place the pulp in a bowl and add the brown sugar and ginger.
  8. In a tiny bowl, combine the water and corn starch until the starch is thoroughly dissolved. Add the starch mixture to the pulp and mix well with a wooden spoon.
  9. Time to fill the tartlets. Using a tablespoon, fill each tartlet until the filling comes just to the top of each crust. Place back in the oven for about 17 minutes until the crusts are golden brown and fragrant and the filling is solid.
  10. Remove from the oven and let cool for about 10 minutes. Remove the paper cups and serve (If you'd like, you can also leave the paper cups on the tartlets and cut away the excess).


Yield: 24 tartlets 

Pallet Shelves


It seems pallet furniture is all the rage right now, so I thought I'd try my hand at it. These shelves are very easy to make and don't cost that much, especially if you can happen across a garden shop that has more pallets then they know what to do with and are willing to part with a few for free. They add a funky, rustic touch to any room and you can use them anywhere in your home, from your kitchen pantry to your bedroom.

What You'll Need (For 2 Shelves):

1 Pallet
4 Large picture hangers
4 50lb. picture hooks
12 1½"  Wood screws
Circular saw
Hammer
Paint, stain or clear finish (optional)
Sandpaper (optional)

1. First thing's first, you need to find a pallet. I came across a small garden shop that listed on Craigslist. They had hundreds sitting in their back lot and had no idea what to do with them all. The owner was all too happy to let me take a few off his hands.

2. Once you get your pallets home, it's time to cut your shelves. Using your circular saw, cut through the boards as you see below. Be sure to only cut the vertical boards and not the horizontal ones. 


3. Once you're done sawing, it might be a good idea to clean off your pieces. The best way to clean them is with a scrub brush and little warm, soapy water. You should now have 2 pieces that look like this:


4. Next, we need to install the bottoms of the shelves. For this piece, you can either use a board salvaged from the pallet, or a fresh 1" x 4" board measured to fit the bottom of the shelf. Insert the screws in the areas shown below:


5. Now comes the fun part - the finish. I used an antique white, flat paint and antiqued them up a bit by sanding the corners and some rough spots along the front. For a more polished look, clean them thoroughly and choose a dark stain like mahogany. You can even leave them completely unfinished and for a weathered look. Once you've settled on a finish, go ahead and give it a go. 

6. After your shelves have dried, turn them over the back side and attach the large picture hangers, one on each end of the top board as shown below:


7. Finally, install the 50lb. picture hangers on a clean wall and hang your shelves.
 

Wine Crate Bookcase


It seems everyone is on a tight budget these days, and if you fall into this category, then this is just the project for you! This bookcase is easy to make and adds a shabby chic flair to any room. I acquired the wine crates for FREE  by simply calling local wine shops to see if they had any that they were going to throw away. I was pleasantly surprised how friendly folks were – many even offered to save a few more in the upcoming weeks just for me. After traipsing all around Boston from wine shop to wine shop, I had enough to make a bookshelf. The one shown is  very simple, but feel free to experiment with turning some boxes sideways, adding extra shelves, or even slapping on a layer of paint.

What You’ll Need:

8 Wooden Wine Crates
32 - 1” Screws (you can also use ¾”)
Drill or Screw Driver
Wood Finish or Stain (optional)

1. Start with two crates, one on top of the other, long side to long side. Drill screws in as shown below (the dashed circle at the top indicates installing the screw in the corner right below the top slat). Repeat this step a total of four times.


2. Next, stack one of your pairs on top of another, as shown below, and drill screws in to secure as shown.


3. Repeat step 2 a total of 3 times. When you are finished, you will have a bookcase! It is up to you if you would like to paint or finish it, but keep in mind, wine crates are unfinished, so it’s usually a good idea to seal them.


Sweet Whey Bread with Fresh Rosemary Cheese and Bourbon Fig Compote


My, my that sounds complicated - but it isn't! I came up with this bread recipe because I hated to waste the left over whey that comes with making cheese. It is a sweet, dense bread with a light crust and it only uses a few ingredients that you most likely have on hand (with the exception of the whey of course). The compote is great for canning and looks beautiful when spread over the cheese*. With the sweetness of the bread, the saltiness of the cheese and the tanginess of the compote, this tasty tidbit it sure to please!

*see my previous post for the cheese recipe

What You'll Need:

Sweet Whey Bread
3 cups white flour
1 tsp baking soda
½ tsp salt
1 cup of whey
1 egg
1/3 cup of sugar

Bourbon Fig Compote
1 ½ cups dried, chopped figs
¼ cup bourbon
¼ cup fresh orange juice
2 tblsp brown sugar
¼ tsp orange zest
¼ tsp ground clove

For the bread:
  1. Preheat oven to 350.
  2. Combine the flour, soda and salt in a large bowl. Sift them together, or do what I do and run a whisk through the mixture a few times.
  3. In a separate bowl, combine the whey, egg and sugar. Beat on high until foamy and tripled in volume.
  4. By stand mixer or by hand: 
    • By stand mixer: switch to the kneading attachment and turn on to a low speed. Add the dry ingredients to the wet in 3 parts. Knead the dough until smooth and elastic about 5 minutes. The dough will be sticky and soft.
    • By hand: slowly fold in the dry ingredients to the wet in 3 parts. Once all flour is incorporated, turn out the dough onto a floured work surface and knead until the dough is smooth and elastic, about 5 minutes. The dough will be sticky and soft.
  5. Once your dough is ready, form it into a loaf and place it on a buttered and floured cookie sheet. Brush the top with any leftover whey or melted butter. Run a knife down the center of the bread to make a slit for air to escape as it bakes.
  6. Bake for about 45 to 50 minutes or until the edges are golden brown.
  7. Let cool on a cooling rack for about 10 minutes before serving. Be sure to slice the bread as thinly as possible, about ¼" thick to serve.
For the compote:
  1. Place all of the ingredients into a medium size sauce pot over medium heat.
  2. Stir constantly until the liquid is absorbed and the fig starts to break down, about 3 to 5 minutes.
  3. Serve warm or can it to save for later.
Yield: About 12 ounces

Enjoy!

Fresh Rosemary Cheese


When I first thought of making cheese at home, I approached the subject somewhat warily. Surely it must be a very involved process involving multiple steps, weird appliances I have never even heard of, and strange specialty ingredients that require driving across town to get. I was pleasantly surprised to discover this is not at all true. After looking over dozens of recipes and techniques, I have come up with this simple recipe for fresh cheese. I suppose this is not technically cheese because it does not use a starter, but it sure is tasty! It's airy texture and flavor are delicious with crackers and compotes or spread on a juicy bosc pear. Check out my post above for another yummy serving option.

What You'll Need:

1 quart of milk
½ cup heavy cream
1 tsp finely ground rosemary
1 tsp kosher salt
Juice of half a lemon

Special Equipment:

Cheese cloth (this can be found at most grocery stores)

1. Rinse the cheese cloth and drape 3 layers over a mesh sieve. Place the sieve inside a large bowl. Make sure the bottom of the sieve sits at least 4" above the bottom of the bowl.


2. Combine the milk, cream, rosemary, and salt in a medium size sauce pot. Slowly stir over medium high heat until the milk comes to a rolling boil.

3. Once the milk begins to boil, reduce the heat down to low and add the lemon juice. Continue to stir until curds separate from the whey, about 1 to 2 minutes.


4. Once separated, gently pour the curds and whey into the cheesecloth. Let the curds drain for about 45 minutes. The longer you let the curds drain, ultimately, the more solid your cheese will be. I usually let mine drain for about an hour.


5. Once your curds have drained, join all four corners of the cloth and twist the extra fabric. Using the twisted fabric, tighten the cheese into a ball and squeeze out any extra liquid. Secure the twisted fabric with a piece of string or a rubber band.

6. For storage, refrigerate your cheese in either tupperware or wrapped in wax paper. Because this is a soft cheese, it is susceptible to other flavors that may be floating around.

Yield: about 1 cup of cheese

And that's all there is to it! Don’t know what to do with all that whey? Check out my next post - Sweet Whey Bread.

Grilled Steak with Roasted Fennel and Leeks


My husband and I recently stayed at a quaint guest house in central New Hampshire. On the evening of our first night there, we headed to the dining room for a nice, relaxed dinner. After poring over the menu, I decided to splurge and order the steak. It was cooked to medium-rare perfection and graced with a delicious butter and cream sauce. Now, I am usually a purist when it comes to grilled steak - a dash of pepper and salt and I'm a happy girl, but all throughout dinner I could not get over this sauce on my plate. I was tasting it, little by little, trying to pull out the subtle flavors. As soon as we got home from our vacation, I hit the kitchen and developed this rustic dish as an homage to one of the best steak dishes I have ever had.

What You'll Need:

- Your favorite cut of steak (I like ribeye)
- 1 medium sized leek
- 1 fennel bulb
- 2 tablespoons olive oil
- 2 teaspoons salt
- 1 ½ teaspoons ground pepper
- 1 cup wild rice
- 2 ½ cups water

For the Sauce
- 2 tablespoons unsalted butter
- ¼ cup heavy cream
- ½ teaspoon orange zest
- 1 teaspoon fresh orange juice
- Pinch of saffron
- Salt and pepper to taste

  1. Preheat oven to 400.
  2. Begin to boil the 2 ½ cups of water on medium high heat.
  3. Wash the leeks and fennel bulb. Starting at the root and ending just as the leaves start to split apart, chop the leeks into rounds about ¼" thick. Place these in a bowl. Finely chop the fennel bulb into cubes like you would an onion. Be sure to remove the top sprigs. These sprigs can be hung upside down and dried to be used in the future. Place the fennel in the bowl with the leeks. Add the oil, salt and pepper to the leek and fennel and toss with your hands to make sure all vegetables are coated.
  4. By now, your water should be boiling. Add the rice and bring back to a rolling boil. Once the rice is boiling, reduce heat to low and cover. Let simmer for about 35 to 40 minutes depending on the type of wild rice you purchased.
  5. Now that the rice is cooking, this gives us time to prepare the rest of the dish. Layer the leeks and fennel into a casserole dish, baking pan, or even a cake pan (this is what I use) and place in the oven for about 30 minutes or until fennel is mostly tender, but still a little crisp.
  6. Now we can prepare the sauce. Place a sauté pan over medium low heat. Add the butter and melt. Pour in the cream, zest, juice and saffron. Stir to combine. The great thing about this sauce is that it can pretty well be left alone while you prepare the other parts of the dish. Just make sure you stir it occasionally so it does not develop a film from the cream. Also, make sure it does not come to a boil. If it begins to boil, turn down the heat.
  7. Time to season the meat. Brush a little bit of oil on each side of the steak. Then seasons with salt and pepper. It is best to use either sea salt or kosher salt. Rub the seasoning into the meat to make sure all surface areas are covered. Let the meat sit about 5 minutes to let the salt and pepper do their magic.
  8. Place the steak on the hottest part of the grill or griddle for about 3 to 4 minutes on each side. If you are unsure about the length of time, when you purchase your cut, ask your butcher how long to cook the steak on each side for your preference of doneness. I prefer medium rare, as this is the best way to coax out those wonderful beefy flavors. Let the meat stand for 5 minutes before serving. This is IMPERATIVE! This ensures the juices will stay in your steak and not leak out all over your plate when you cut into it for the first time.
  9. Time to plate! Spoon out about a ½ cup of rice into the center of the plate. Place the roasted fennel and leek mix on top of the rice. Place the steak on top of the roasted veggies. Now for the pièce de résistance - pour some of the sauce over the steak and garnish with shredded carrot.


Enjoy!